How to Create To Do List Project In Java Netbeans
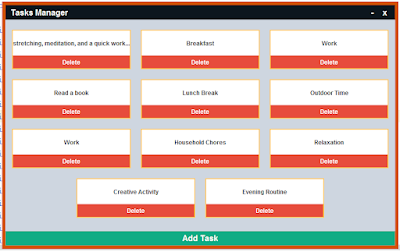
In this Java Tutorial we will see How To Create a To Do List Project in Java NetBeans.
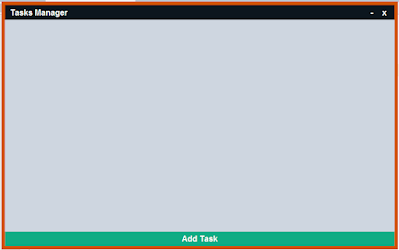
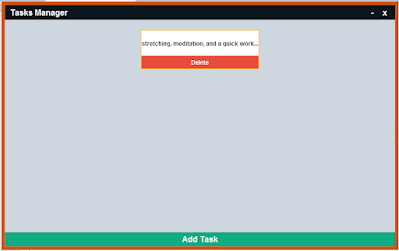
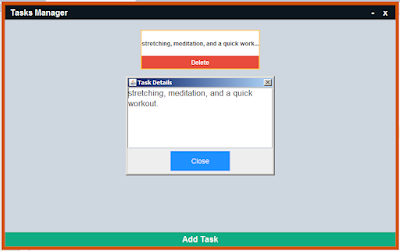
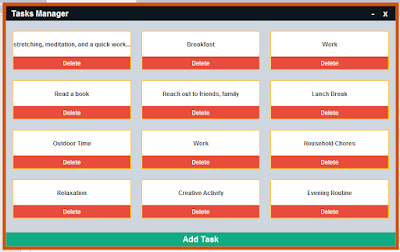
This application provides a beautiful interface for managing tasks, allowing users to add, view, and delete tasks.
What We Are Gonna Use In This Project:
- Java Programming Language.- NetBeans Editor.
Project Source Code:
public class TasksManagementApp {
private JFrame frame;
private JPanel titleBar;
private JLabel titleLabel;
private JLabel closeLabel;
private JLabel minimizeLabel;
private JPanel dashboardPanel;
private JButton addTaskButton;
private ArrayList<String> tasks = new ArrayList<>();
// Variables for dragging the form
private boolean isDragging = false;
private Point mouseOffset;
// Constructor
public TasksManagementApp(){
// Create the main JFrame
frame = new JFrame();
frame.setDefaultCloseOperation(JFrame.EXIT_ON_CLOSE);
frame.setSize(800,500);
frame.setLocationRelativeTo(null);
frame.setUndecorated(true);
// Set border for the frame
frame.getRootPane().setBorder(BorderFactory.createCompoundBorder(
BorderFactory.createMatteBorder(7, 7, 7, 7, new Color(211,84,0)),
new EmptyBorder(0, 0, 0, 0)));
// Create the title bar
titleBar = new JPanel();
titleBar.setLayout(null);
titleBar.setBackground(new Color(12,22,30));
titleBar.setPreferredSize(new Dimension(frame.getWidth(), 30));
// Mouse listener for window dragging
titleBar.addMouseListener(new MouseAdapter() {
@Override
public void mousePressed(MouseEvent e){
isDragging = true;
mouseOffset = e.getPoint();
}
@Override
public void mouseReleased(MouseEvent e){
isDragging = false;
}
});
// Mouse motion listener for window dragging
titleBar.addMouseMotionListener(new MouseAdapter() {
@Override
public void mouseDragged(MouseEvent e){
if(isDragging){
Point newLocation = e.getLocationOnScreen();
newLocation.translate(-mouseOffset.x, -mouseOffset.y);
frame.setLocation(newLocation);
}
}
});
frame.add(titleBar, BorderLayout.NORTH);
// Create and configure the title label
titleLabel = new JLabel("Tasks Manager");
titleLabel.setForeground(Color.WHITE);
titleLabel.setFont(new Font("Arial", Font.BOLD, 16));
titleLabel.setBounds(10, 0, 250, 30);
titleBar.add(titleLabel);
// Create and configure the close label (exit button)
closeLabel = new JLabel("x");
closeLabel.setForeground(Color.WHITE);
closeLabel.setFont(new Font("Arial", Font.BOLD, 17));
closeLabel.setHorizontalAlignment(SwingConstants.CENTER);
closeLabel.setCursor(new Cursor(Cursor.HAND_CURSOR));
closeLabel.setBounds(frame.getWidth() - 50, 0, 30, 30);
// Add mouse listeners to the close label
closeLabel.addMouseListener(new MouseAdapter() {
@Override
public void mouseClicked(MouseEvent e){ System.exit(0); }
@Override
public void mouseEntered(MouseEvent e){
closeLabel.setForeground(Color.YELLOW);
}
@Override
public void mouseExited(MouseEvent e){
closeLabel.setForeground(Color.WHITE);
}
});
titleBar.add(closeLabel);
// Create and configure the minimize label
minimizeLabel = new JLabel("-");
minimizeLabel.setForeground(Color.WHITE);
minimizeLabel.setFont(new Font("Arial", Font.BOLD, 17));
minimizeLabel.setHorizontalAlignment(SwingConstants.CENTER);
minimizeLabel.setCursor(new Cursor(Cursor.HAND_CURSOR));
minimizeLabel.setBounds(frame.getWidth() - 75, 0, 30, 30);
// Add mouse listeners to the minimize label
minimizeLabel.addMouseListener(new MouseAdapter() {
@Override
public void mouseClicked(MouseEvent e){
frame.setState(JFrame.ICONIFIED);
}
@Override
public void mouseEntered(MouseEvent e){
minimizeLabel.setForeground(Color.YELLOW);
}
@Override
public void mouseExited(MouseEvent e){
minimizeLabel.setForeground(Color.WHITE);
}
});
titleBar.add(minimizeLabel);
// Create the dashboard panel
dashboardPanel = new JPanel();
dashboardPanel.setLayout(new FlowLayout(FlowLayout.CENTER,20,20));
dashboardPanel.setBackground(new Color(206,214,224));
frame.add(dashboardPanel,BorderLayout.CENTER);
// Create and configure the "Add Task" button
addTaskButton = new JButton("Add Task");
addTaskButton.setBackground(new Color(16,172,132));
addTaskButton.setForeground(Color.WHITE);
addTaskButton.setFont(new Font("Arial", Font.BOLD, 16));
addTaskButton.setBorderPainted(false);
addTaskButton.setFocusPainted(false);
addTaskButton.setCursor(new Cursor(Cursor.HAND_CURSOR));
// Add action listener to the "Add Task" button
addTaskButton.addActionListener((e) -> {
// only allow 12 task (Limits the number of tasks to 12)
if(tasks.size() < 12){
String task = JOptionPane.showInputDialog(frame, "Enter a new task: ", "Add Task", JOptionPane.PLAIN_MESSAGE);
if(task != null && !task.isEmpty() && !task.trim().equals("")){
tasks.add(task);
updateTaskPanel();
}
//you have nothing to do with your time
else{
JOptionPane.showMessageDialog(frame, "So, you have nothing to do with your time?","Empty Task", JOptionPane.WARNING_MESSAGE);
}
}
else{
JOptionPane.showMessageDialog(frame, "You cannot add more than 12 task, Delete some tasks to add new ones","Tasks Timit Exceeded", JOptionPane.WARNING_MESSAGE);
}
});
frame.add(addTaskButton, BorderLayout.SOUTH);
frame.setVisible(true);
}
// Update the task panel with the current list of tasks
private void updateTaskPanel(){
dashboardPanel.removeAll();
for(String task : tasks){
addTaskPanel(task);
}
dashboardPanel.revalidate();
dashboardPanel.repaint();
}
// Add a task panel with delete button to the dashboard panel
private void addTaskPanel(String task){
JPanel taskPanel = new JPanel();
taskPanel.setLayout(new BorderLayout());
taskPanel.setPreferredSize(new Dimension(240, 80));
taskPanel.setBackground(Color.WHITE);
taskPanel.setBorder(new LineBorder(new Color(254,202,87),2));
JLabel taskLabel = new JLabel(task);
taskLabel.setHorizontalAlignment(SwingConstants.CENTER);
taskPanel.add(taskLabel,BorderLayout.CENTER);
// Add mouse listener to show full task text on click
taskPanel.addMouseListener(new MouseAdapter() {
@Override
public void mouseClicked(MouseEvent e){
showTaskDetails(task);
}
});
// button remove task
JButton deleteButton = new JButton("Delete");
deleteButton.setBackground(new Color(231,76,60));
deleteButton.setForeground(Color.WHITE);
deleteButton.setBorderPainted(false);
deleteButton.setFocusPainted(false);
deleteButton.setCursor(new Cursor(Cursor.HAND_CURSOR));
// remove task action
deleteButton.addActionListener((e) -> {
tasks.remove(task);
updateTaskPanel();
});
taskPanel.add(deleteButton, BorderLayout.SOUTH);
dashboardPanel.add(taskPanel);
}
// Show task details in a custom dialog
private void showTaskDetails(String task){
CustomDialog customDialog = new CustomDialog(frame, "Task Details", task);
customDialog.setVisible(true);
}
// Create a custom dialog class for displaying task details.
// Contains a JTextArea for displaying the content and a "Close" button to close the dialog.
class CustomDialog extends JDialog{
public CustomDialog(JFrame parent, String title, String content){
super(parent, title, true);
setDefaultCloseOperation(DISPOSE_ON_CLOSE);
setSize(300, 200);
setLocationRelativeTo(null);
JPanel panel = new JPanel(new BorderLayout());
JTextArea textArea = new JTextArea(content);
textArea.setEditable(false);
textArea.setLineWrap(true);
textArea.setWrapStyleWord(true);
textArea.setFont(new Font("Arial", Font.PLAIN, 17));
JScrollPane scrollPane = new JScrollPane(textArea);
panel.add(scrollPane, BorderLayout.CENTER);
JButton closeButton = new JButton("Close");
closeButton.setPreferredSize(new Dimension(120, 40));
closeButton.setFont(new Font("Arial", Font.PLAIN, 14));
closeButton.setBackground(new Color(30,144,255));
closeButton.setForeground(Color.WHITE);
closeButton.setFocusPainted(false);
closeButton.setBorderPainted(false);
closeButton.addActionListener((e) -> {
dispose();
});
JPanel buttonPanel = new JPanel(new FlowLayout(FlowLayout.CENTER));
buttonPanel.add(closeButton);
panel.add(buttonPanel, BorderLayout.SOUTH);
getContentPane().add(panel);
}
}
/**
* @param args the command line arguments
*/
public static void main(String[] args) {
new TasksManagementApp();
}
}
The Final Result:
More Java Projects:
Download Projects Source Code

